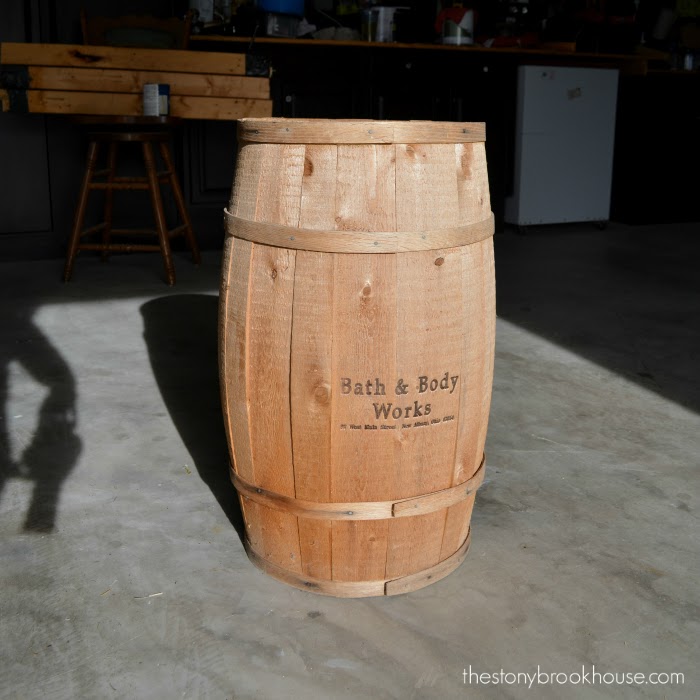
It all started with this barrel... I've had it for ages. I worked part-time at Bath & Body Works over 10 years ago. They used to do really elaborate store decorations. This was probably back from when they had a more "country theme" to the store.
Btw... I didn't steal it. Most of the time, they threw away their decorations after a store reset, so we were free to take what we wanted. 😊
Anyway.... I've wanted to use it, but not with that HUGE stamp on it. It must have been burned into the wood or something. I tried sanding it, using a Dremel, nothing really worked. So, I thought why don't I try staining it?? Duh!
Here you can see I'm just getting started....
You can barely see the stamp now. :) Then I brushed on one heavy coat of an outdoor sealer.
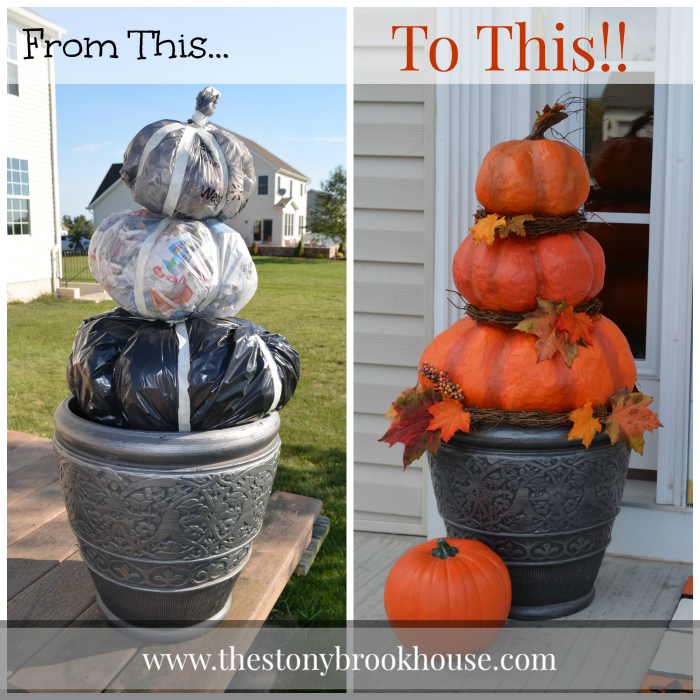
A couple of years ago I made these DIY clay pumpkins. That post just went viral this year! In my tutorial I'll show you step by step how to make those cool looking pumpkins. 😊
DIY Outdoor Real Looking Pumpkins
Anyway, they've held up pretty good, so far. I should have cleaned them up better when I brought them in last year. It was a wet year and they got a bit moldy. The soil in the pot under a plastic layer, probably didn't help.
That's why I'm fixing up the barrel. I think they'll look great on it, and it might stay drier!
So, I cleaned them up. I tried just wiping them, nope. Then I got out a magic eraser, nope. Next, I tried a toothbrush and some bleach. That seemed to work the best. A lot of the mold came off.
Here's more of a close up. That whitish area wiped right off.
Once they were cleaned up, I added a bit of paint to cover up any black marks left.
You can see here how much better they look! I just grabbed some paint that was close... I wasn't too concerned whether it matched because it won't show.
Then I sprayed a couple of coats of Minwax Helmsman Spar Urethane. They look pretty good. I'm ready to stack them up for the front porch!
Don't they look nice?!
Here's the whole front porch... I can see that I am completely lacking on the fall decor here.... I'm a blogger for goodness sake! I think I can do a bit better than this!
We did a bit of work on our front porch lately... One we took down the "balcony to nowhere" that was on top of the porch roof. We think it looks sooooo much better!
Also, you can barely tell, but we built in that space above the keystone on the front door frame. Here's a before photo.
Birds kept building nests up there and making a mess on the porch. So, hubby fixed it up and I gave it a fresh coat of paint. I still need to paint the columns, but I'm running out of good weather...
Don't you think the pumpkins look great with our front door!
Blessings!!


Hi Lori,
ReplyDeleteI love what you've done with the pumpkins. I'm going to try it as a project with my nine year old granddaughter who lives at my house with her Mom (my daughter). I am in Seminole, Florida between Clearwater and St. Petersburg. Weather here will stay better for all of the fall and most, if not all, the winter so I hope I can avoid the mold. Will start this in September but wait till mid-October probably o put it out front depending on our rainy season. (Also hurricane season isn't over till Nov 1 but it's rare to get a hurricane that late! I was thinking of adding some little twinkle lights amongst the pumpkins for evening. What do you think? Maybe orange twinkle lights if available. (Not sure if "twinkle lights" is the correct name but I think you know what I mean, right?
Be blessed - I ❤️ Jesus too!
Judy
Wow! I have been looking for affordable, easy DIY decorations for the fall. You are right! $90 for seasonal pumpkins! I rather spend that on my two little girls. Your pumpkins look great, just with stuff around the house. I can't wait to try it. Thanks for the idea.
ReplyDeleteYour pumpkins are fantastic! You are very creative. I am going to try this. Love the barrel. Your front entrance looks great.
ReplyDeleteThanks so much!!
Delete