Once we get rolling into this powder room series, you'll see how easy projects GROW! 😝 And if you missed the Powder Room Problems & Inspiration, you can check that out!
But today I'm going to focus on the
Super Easy & Cheap Shiplap
So, the first day was tearing off the trim and that stupid wallpaper.... I wasn't sure if it was going to be a nightmare, or smooth sailing. Turns out that it was both!The wallpaper part was a breeze! It literally just peeled off. Thank You Jesus!! 🙌 The trim part... not so much. That basically ripped off sections of drywall. Ugh!!
After I finished taking off the trim, I got right into repairing the wall, since that was going to take time to dry, sand, prime, etc...
Any section that I didn't repair will be covered by shiplap! 👍
I couldn't WAIT to start shiplapping. Is that even a word? I always get so excited about starting a project, but then comes the bending, measuring, cutting, remeasuring, recutting.... hahaha. But I love it. Especially when it looks sooo good!
But before I started that fun part, (actually, if you look carefully, I already started a small strip on the bottom...but...) I realized I probably should sand ALL the stripes and paint the upper portion of the wall. Okay, well, that should be a simple task! And it was, after I sanded down all the repairs, primed the repairs, re-sanded the repairs and primed again.... then I could paint. Whew! I painted it a nice gray that we have in the kitchen, Valspar Polar Star. (Which I ended up changing after everything was all said and done!) 🤪 More on that later...
Okay baacck to shiplap... I've used this same technique in a couple of places in our home and even in one of our rental properties. It's cheap, simple and easy!
Here's where I did an accent wall in our kitchen. It was a fun project, we used plywood to have more grain in the wood. Check it out, 'The Very Cheap Plank Wall'.
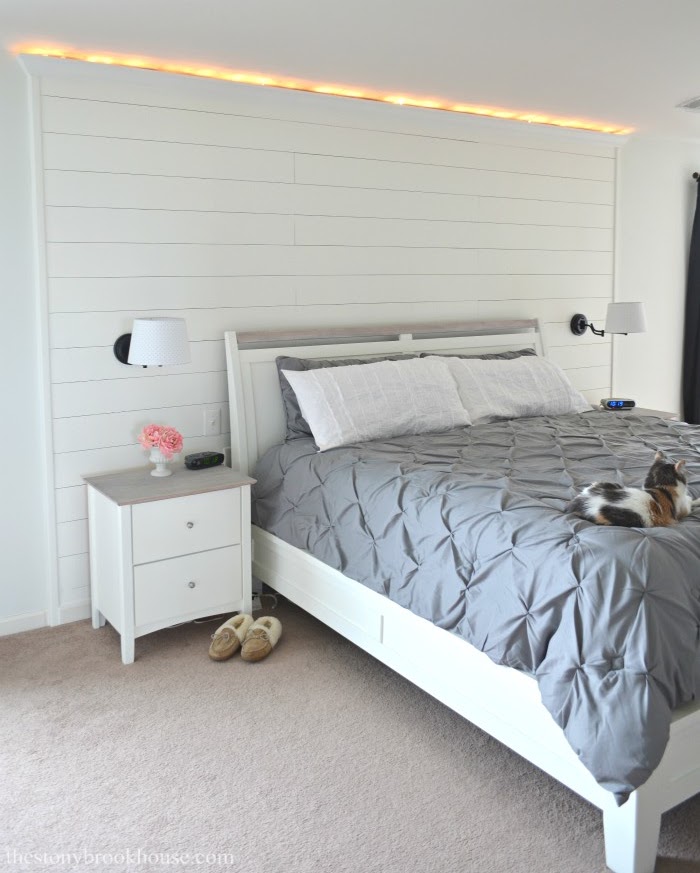
And we just finished this accent wall in our master bedroom. I just LOVE our master bedroom makeover. ❤️ You can check out that post, here.
So, to get this really cheap and easy shiplap, I went to Home Depot and found an employee to help me pull a couple of 8x4 ft. sheets of underlayment down. The are usually around $13 a sheet. (Which is soooo cheap!) Then we rolled them back to the saw and he cut them into 6 inch strips. Lowes won't do the cuts for me, which I think is dumb. But Home Depot has ALWAYS been more than willing and usually never charges me for the cuts.
I would really prefer to cut them at home, if I had the time and ability to cut them myself. The cuts at Home Depot can be a bit jagged, either from pushing them through the saw too fast or most likely a dull saw blade. When we've been able to cut them at home, the cuts are nice and smooth. Oh well, this girl didn't have time for that! If the strips are a bit rough, I will sand the edges quickly to smooth them out, pretty simple.
I got all my strips home and got to work. I figured on one strip 3 inches wide, then 7 full 6 inch strips. Remember, I wanted to makes sure I was above the outlet, but UNDER the light switches. So, I had to do some math... and double and triple check that math!!! No mistakes this time!
Next, I pulled out our trusty air compressor and nail gun and got to work!
Basically, to install the shiplap, you need to measure the wall, cut to fit and nail it up. Be sure to mark where your studs are, because you want to nail the shiplap into studs to secure it to the wall.
These miter cuts are NOT fun.... especially when you have a cheap chop saw that isn't exactly on point. I think I'm going to splurge on a new one for Christmas! 😍
I made due and got them done. They might not be perfect, but no one will really notice, especially with a little wood filler. 😉
It worked out perfect! I left exactly enough room for a piece of 1x2 for the trim piece on top. 🙌 You can barely see the light switch in this photo to the right.
You might have noticed that I didn't show you much of the back wall.... well, there's a reason. Last minute, I decided to tear the sink out.... 😯
Yeppers! I'll tell you more about that in my next post! Besides, I think this post is LONG enough!
Incase you want to pin for later!
Thanks for reading!
Blessings!


No comments
Post a Comment