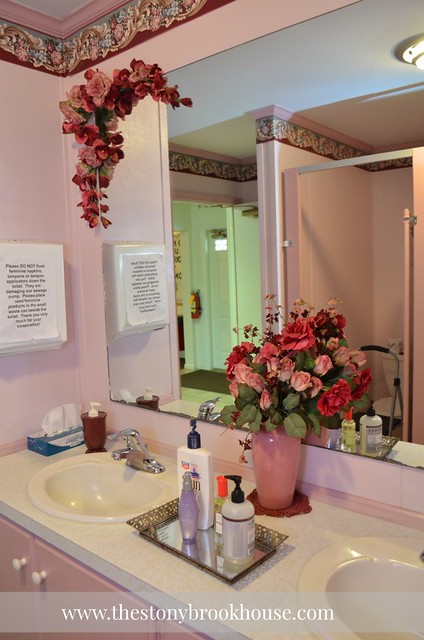
Here I am finally with the Mirror Frame Tutorial! Yay! I must tell you, this little bathroom at our church is looking pretty spectacular! Again, here is what we were working with....
This mirror is original. It's held on with flat mirror clips. The edges are pretty bad, where the mirror has water damage. This poor thing needed some serious help! It's really, really big so framing it out was the way to go!
All of us on the committee, looked at pictures of different ways to frame out the mirror. We decided on using mostly 1x6's and installing the light fixture in the frame area. So, first up I bought 3- 1x6 primed mdf boards, 2 - 1x2 primed boards, 1- 1x8 primed board and 1 -1 1/2" primed crown molding.
Here they are all painted. My friend, Kim, came in and gave them 2 coats of white paint. There's hubby crunching the numbers for the frame build. He's much better at that. I will do just about anything to get out of mental math....
First, we used some 3/8" plywood we had hanging around the house, to give the frame support. It is screwed it in where the studs are. If you look closely, I had to add just a bit more wood to make it even with the mirror clips. Some paint sticks we cut up, did the trick.
Here you can really see the water damage on the mirror, but that will all be hidden when we are finished. :)
On the sides, there were no studs, so we put in some drywall anchors to help support the frame sides. Have you ever used the "drill-in" anchors?
Sorry, for the horrible blurry pic.... But these babies are a.w.e.s.o.m.e!!! All you do is drill them in with a phillips head. They go in soooo easy! And they are very stable and strong!
Then just add the side supports. Easy!
Next we put up the bottom board of the mirror frame up. We figured how much of it we wanted covering the mirror and used little blocks of wood on the bottom edge to hold it up and then used the nail gun to attach it. Then we laid the 1x2 on top of the bottom board and nailed that on.
No miter cuts!! :)
Here, you can see the side frame pieces have been attached. Using my trusty nail gun. That frame isn't going anywhere! Hubby, of course, was helping and guiding me along the way!
Isn't it looking beautiful! I installed the supports for the top piece and you can see where the hole was for the light fixture.
Hubby measured and cut a new hole in the 1x8 for the new placement of the light fixture.
He's pretty handy with that tool.
We are lowering the fixture to fit in just above the mirror, so I had to figure out an easy way to cover up that old hole...
(Don't worry...I got it covered!!) Next up, (sorry no picture, but I think you'll get the idea) we nailed the other 1x2 to the tops of the side frame boards. Then we added the top 1x8 frame board.
Of course, Hubby had to cut a new hole in the wall for the box and feed the wires down to it.
Ooops!! My supports are showing! No big deal... that will be covered with the crown molding. And you won't even see that old hole. :)
Hubby completed wiring the fixture, and I put up the crown molding. It is nail gunned to the top 1/2in edge of the 1x8. I was considering putting in some crown supports behind it, but it was solid, so I didn't bother.
AAAHHHHH!! Gorgeous, right??? I spackled up the nail holes with white wood filler. I'll sand it and come back over it with another coat of paint. This can't possibly be the same bathroom!!
Here's the completed frame.
Let's just look at this again.... side by side...
Wow!... and we aren't done yet!!!
I've been at the church most of the week working on the floor. I'm so glad that my friend, Penny, was there a couple of days to help me! :) That's for another day.
Blessings,


amazing transformation girl!
ReplyDeleteThanks, Sara!! So glad it's all coming together!!
DeleteReally great job! I'm going to do the frame, it's gorgeous, and I've been thinking about painting our kitchen counters. How are the bathroom counters holding up?
ReplyDeleteHi Ali!
DeleteThanks for checking things out! The frame was really pretty easy! The counters are holding up beautifully! The more use, the more coats of polyacrylic. Thanks for stopping by! Btw... love your blog!!
Thanks, Kim! You stopped by my blog! Yay! ;)
ReplyDeleteWow, what an amazing transformation, between changing the color of the room and framing the mirror. Gorgeous!
ReplyDeleteHave a great week.
Thanks, Marigene! It really changed the whole look! The ladies at church love the bathroom now! :) Thanks for stopping by!
Deleteawesome
ReplyDelete