Anyway... I read several posts on how to apply the gel stain. First, lightly sand the drawer/cabinet/whatever. Wipe the dust off well, and apply stain. There are basically 2 techniques to applying the stain. I definitely preferred one over the other.
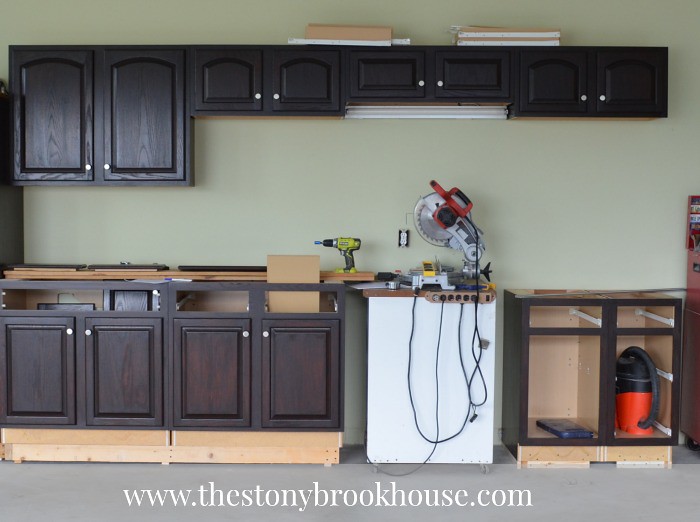
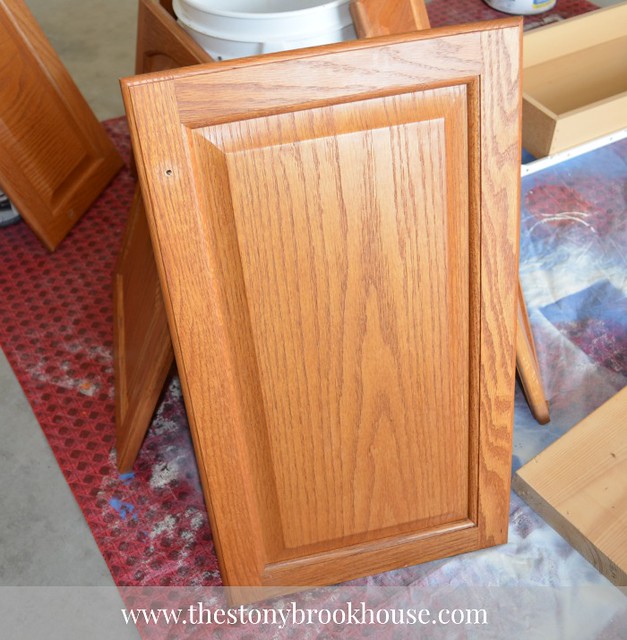
But I must first show you the before and after because, I am truly amazed at the transformation!! Here is the before from an Update On The Garage Post. Of course, they are just stacked there... But keep scrolling!
And the AFTER...... Can you believe they are the same cabinets? Truly they are! Hubby and I are so happy with how they came out. There's something wrong when the garage cabinets look better than your kitchen cabinets.... right??!! Well, hopefully, it wont be long now. :)
So, let me take you though the cabinet staining process. Ok, I already sanded and wiped down. And you aren't sanding off the entire finish. Really, you only need to sand for about a minute a door. They don't even look like they've been sanded, but I honestly did!
I can barely stand that orange oak color... Ugh! Let's get to staining!!! The first, was the sock method. Put on some gloves and put a sock on and just wipe the stain on. I did that for the first coat, and I wasn't too impressed. It didn't seem like much.
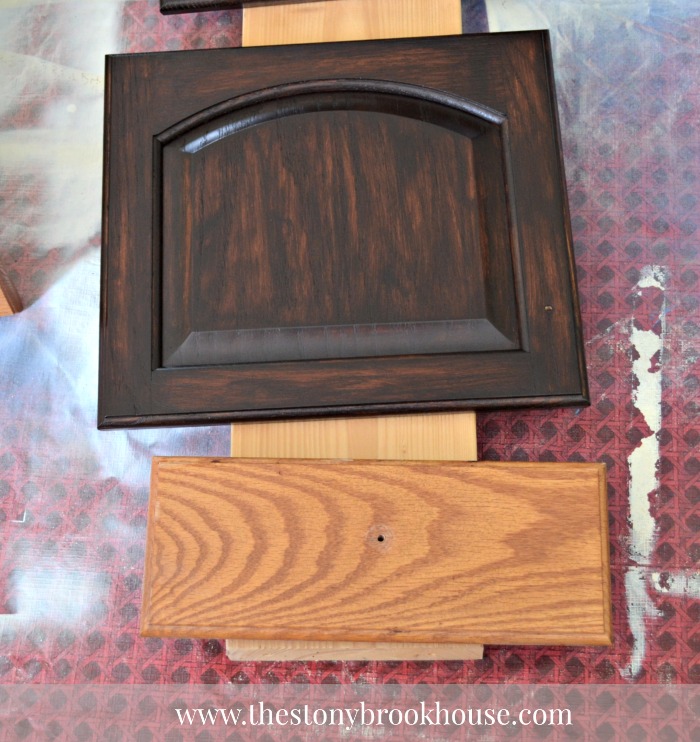
Let's move on to the next technique. This is the one that I liked a lot more! I went out and bought a bag of cheap foam paint brushes. It came in a bag of 12 for $1.50. They seemed easier, less messy and better coverage. Check it out here in this picture. Can you pic out the 2 cabinet doors that I used the foam brush on? Well, I gave it away... :)
It takes a long time for the stain to dry. Of course, it was hot and humid in my area, which extends the drying time... I gave it 24 hours. It sets pretty quick, but when they are dry, there is no tackiness. On to the 2nd coat.
Okay... we're getting there. Hubby actually liked this stage.... Uhhh... No. We are not going back to the 70's. Do you remember that look? Blech!
You can see the 2 doors, they look so much better after the 2nd coat. Another day... Keep pluggin away. :) Here we go with the 3rd coat!
Now that's more like it! I was wondering how it was going to hold up. I did try to scratch it with my fingernail and it wouldn't come off. But Hubby did hit a side cabinet and it marked it a little, but easy enough to touch up. It is important to paint in the direction of the grain. As you can tell, it almost makes it's own "grain" markings.
This looks soooo good! You can still see those 2 doors are darker. I did go over the others once more, just to deepen the color. Love, Love, Love!!! As you can see we are definitely making progress. So, if you want to change that icky orangey oak color to a beautiful coffee color, check out General Finishes. I ordered my can online at Amazon. So glad I bought the quart!

Can't wait to show you all the other progress, we've made!
Blessings,


Lori - I love that rich, dark stain! Java is the perfect name for it!!! The cabinets look awesome!
ReplyDeleteThanks, Doreen! We are so please with how everything is turning out. It just takes WAY longer than you ever expect.... Oh well. :) Hope you are enjoying your summer! Blessings!
Delete