I’m here to share how I/we made all the different wood accents on the Gallery Wall Update. It’s looking pretty good don’t ya think??
The first accent I wanted to make was a basic arrow. They are all over Pinterest. I had this leftover wood forever. It was from a CD holder I transformed into a Necklace Organizer.
Anyway… It’s a very thin wood and easy to cut. I drew this arrow with just a ruler and some guessing. Not too bad! Then I cut it out using a bandsaw.

It’s been pretty cold here and the garage is freezing! So, sweet Hubby brought the bandsaw down to the basement for me to use. The wood is so thin, it hardly made a mess. I cut out the first one and traced two more. I only put up one, but I was pretty sure that when I showed it to my daughter she would want one… sure enough!
Bet you'll never guess what I used to hang the arrow on the wall?? These little things are sooo handy!! Command Picture-Hanging Strips
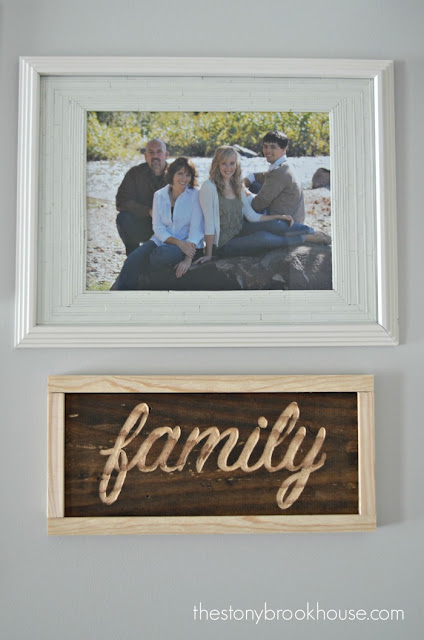
The next accent was the family sign. I don’t know why but I just knew I wanted this sign. I stained an old board and printed up “family” on the computer and traced it onto the board.
This is where Hubby got in on the action and "Dremeled" out the word for me. I love how he’s always so willing to jump in and help me. Have you ever used a Dremel

Here’s a close up.

I love how the wood grain shows through. Then we framed it out with some old scrap wood we had.
In my last post, I told you that I didn’t purchase anything for this project… I forgot! I purchased a 1x6 for the chevrons…oops, sorry about that!
This was the only picture I took… I don’t know what I was thinking. It frustrates me when I forget that I'm a "blogger". :/ Anyway, I made the block about 2 1/2 inches long and cut it at a 45 degree angle. To make them the size I wanted, I cut off about 1/2 inch off the side of each block.

Stained and nailed them together with my nail gun. Pretty easy! Can you guess how I put them up...Yep! You guess it! Command Picture-Hanging Strips
Next, I worked on something for our anniversary sign. We took that picture (the one to the right that's upside down) on our cruise to the Bahamas for our 25th anniversary and I just wanted a little something stating that we'd been married 25 awesome years when that picture was taken! We'll be celebrating 28 amazing years in just a couple of weeks!
I picked up that little tray at the Goodwill ages ago. I always had good intentions to do something with it and now was the time. I used the DIY Chalk Paint for the frame of it, and painted the bottom black.

I had more slats from the CD holder and used those for this project. I cut them to fit and stained them different shades. Then I glued them in place.

Next, I printed up “25” on the computer and traced it onto the tray. Then painted it.

I distressed the tray a bit, it looked too pristine. :) Doesn't that look nice?!
The last project was the letter “L”. This was fun! I made a cardboard cut out to gauge how large I wanted it.

Then I made a plywod base.

Hubby had ripped the edges off of a 2x4 for another project a while back, and I used the edges to create a “pallet” style L. I cut them different sizes and stained them different shades.

Love, love, love! The way it came out!! I used a piece of trim to frame it out. The miters are far from perfect… oh well. I don’t do perfect.

So there you have it. They were pretty simple to make. It just took some time. Hubby and I are really happy with how it looks now. Not too bad, for mostly scrap.
Blessings!


No comments
Post a Comment