I am loving how my little tiny laundry/mudroom is coming along!
We've come a long way baby.... From this....
To this!!!!
What a transformation! AND we aren't done yet!!
There was sooo much empty space not being utilized above the washer and dryer and I knew there had to be a better way. This turned out exactly how I envisioned this to look and I can't believe it came out so awesome! I may have had the vision, but hubby is the numbers man and made this space happen, I couldn't have done it without him! 😘
We didn't purchase cabinets that go all the way to the ceiling. One...we didn't need the storage and two... we didn't want to spend the extra money. So, we created a framework for the cabinets to be attached to, starting with studs on the ceiling.
We just used old wood we had on hand. No one is ever going to see the framework. The pink wood was from an old bed frame hubby build for our daughter.
It's definitely strong enough to hold cabinets!
One cabinet up!
Next, we duplicated what I did to our kitchen cabinets when I built them up the the ceiling. You can see that here, Extending Kitchen Cabinets To The Ceiling.
It's really easy, we added some scrap to the top lip of the cabinets.
Then we nailed up the mdf board to complete that space. As you can see, we had to move the light fixture. That's a nice big hole that'll need patching.
Along the right side of the cabinets, I wanted a wall top to bottom, to complete the built-in look. We finished the extention to the ceiling, then added the beadboard paneling.
Supports were added to keep it in place. We also added supports for the shelf that was going to go above the washer and dryer.
I needed a place for all my laundry baskets. The shelf holds some, but I needed just a few more baskets, so we cut holes in the cabinets to hold them. It worked perfect!!
I purchased one of those patch kits to fix the hole that was left from the light fixture, like this one Walboard Drywall Repair Patch. So easy to use!
Can we talk about this gorgeous light fixture??? It looks like a fan, but it's not. It gives off so much light and it works perfect in this space! I purchased it on Amazon. Here's the link. Kira Home Gage 18" 5-light Fan Style Light
The real game changer for this built-in, was creating this faux wall. Hubby and I were really concerned about the 'what if' we ever need to work on or replace our washer and dryer? How in the world would we be able to get them in and out? It's a pretty tiny space we are working in....
So our solutions was to build a faux wall that can slide out when needed! Genius, right???
This is what the back side looks like. Of course, it will all be painted white.
It just slides right into that slot at the wall. I am sooooo happy with the way that turned out!! Plus the shelf that is above the washer and dryer is in sections and those are removable as well. We tried to think of 'all the things'!!
I just LOVE how this came out!! Doesn't it look great with the stenciled floors?? You can see that post here, Painting & Stenciling Vinyl Floors.
Wall open....
Wall closed.
Can't wait to show you the next part in this laundry room makeover. 😍
Blessings,
You also might like:
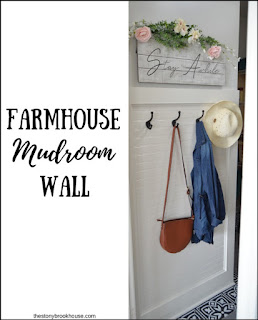
Farmhouse Mudroom Wall


Hi Lori!
ReplyDelete"Removable" caught my eye because I realized that I have at least two removable posts up-- a clothesline and a backsplash. Removables are perfect! May I ask why you didn't build the cabinet space all the way back to the wall?
Have a great week! I plan to-- just finishing up homeschooling with a project fair--- so looking forward to summer!!!